Article
Hadrian's Wall
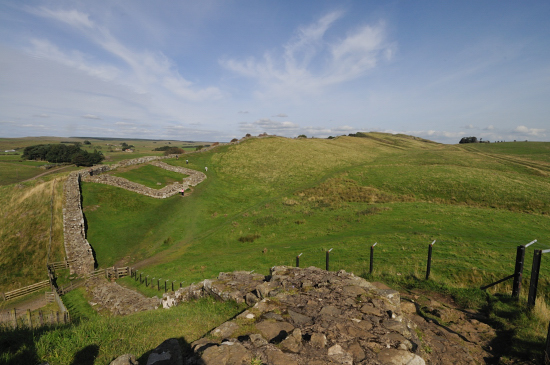 
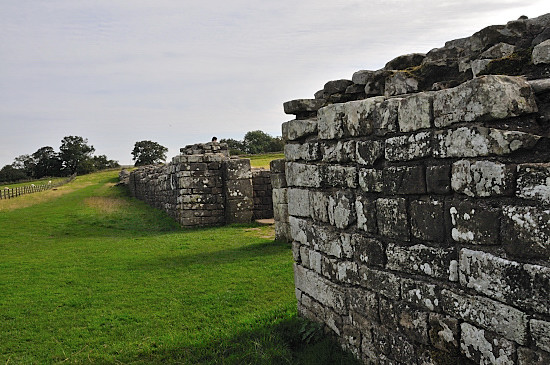
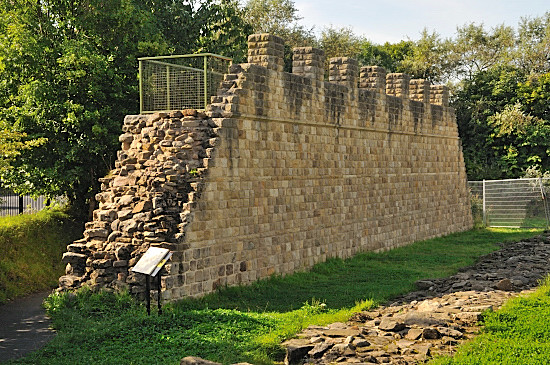
Cawfields
Roman Wall and Milecastle 42

Hadrian's Wall
as we call it today, is a structure that crosses England, it is 73.5 miles or
117 kilometres long.
The wall contains milecastles every roman
mile, a little shorter than our modern mile and in between these, 2 turrets, there
were a few forts along the wall to start, the number of forts being increased
later to 16 or 17. Behind the wall there are additional large forts on a supply
road and between these at a days marching distance, smaller forts or marching
camps. In front of the wall on the western side are three forts. Some think
there were other early warning forts at intervals at around 8 to 10 miles north
of the wall along the walls length.
The eastern end of the wall was originally of
stone and the western end where there was no natural rock, it was made of turf,
with stone milecastles and turrets. Later much of this was rebuilt in stone.
| Beyond this forts, milecastles and turrets
continued for some distance down the Cambrian coast, but there was no wall
between them. We have not included the coastal extended section here. The wall structure
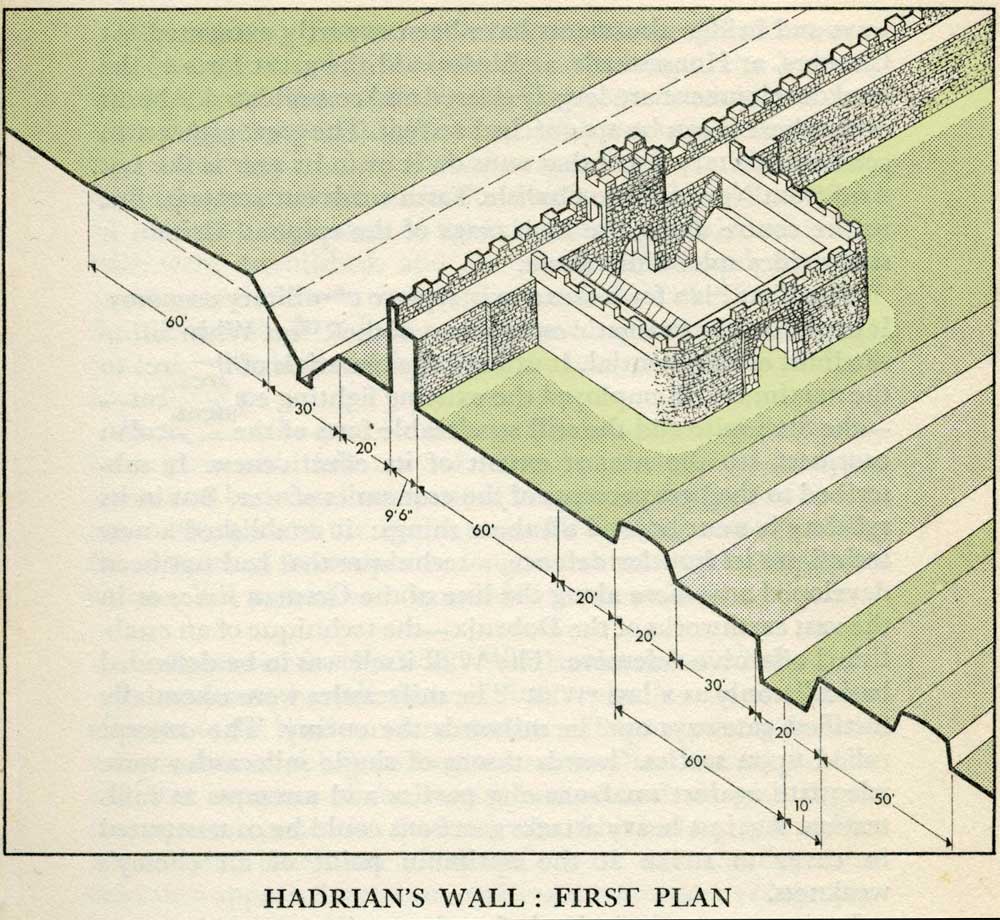
developed over time, but the basic plan to start is shown on the right,
in an illustration from an old book.
Starting at the north we have:-
A flat 60ft wide raised area,
created from material from a ditch. Except where on a sheer drop.
Deep V shaped ditches with encampments
in the bottom, except where on a sheer drop. The standard fighting ditch
was 30ft by 13ft 6inches deep.
A 20ft berm or Patrolable or movement
area along the wall.
So north of the wall for at least 110
feet there was no cover and with a V shaped ditch there was no hiding
place from men on the wall top.
Stone curtain walls with milecastles, and turrets the initial design for the wall was 10ft wide, 15ft
6 inches high and surmounted by 6ft crenulations, so 21ft 6inches high to the
north. Later some of the wall was created narrower. The
crenulations were also probably on the south side although most
illustrations show it one sided.
Military space, this varied, sometimes
getting larger to allow easier digging behind. Later a military road ran
up much of this.
Vallum, a bank, 20ft wide bottomed
ditch and bank, defining the military area.
At each Roman mile there was a milecastle with a
north gate opening through the Wall, surmounted by a defensive turret and a
south gate. In the original plan there were two barracks and the milecastle
maintained and staffed the turret each side of it. Turrets had a rear door
only and ladder that could be raised to allow access to the upper section.
Initially the milecastles were the equivalent
of tax collecting and control points and people could move both in and out, so
at this time there had to have been a way to cross the northern ditch and
vallum at each milecastle. Later most of the milecastles were not used and
there were only a limited number of crossing places at forts. The vallum and
ditches were then fully dug out the rest of the way.
A modern mile is 1760 yards while a
roman mile was 1620 yards, this is 0.92 of a mile or 1.48km. |
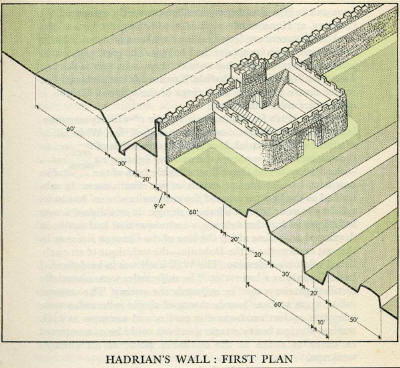
Plan of the wall

click on images to see a larger version

Many years of
resurfacing the road on the right has brought it well above the pillar
base
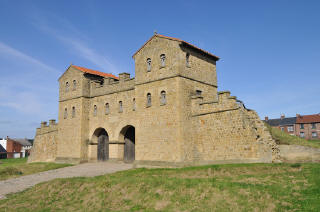
Corbridge
Roman Town
|
Today we refer to the rear ditch and bank
structure as the vallum but the Romans called the whole wall structure
"Vallum Aelium". At
other times the wall was also known as the the Picts or Pictes wall and Severus wall, the
Pictes name spelt two ways is shown in early maps from the beginning of the 17th
century, and Severus on a map of Newcastle from 1610. Bede far earlier in
Historia Ecclesiastica 1.5,
 gives an account of how the wall came about and credited its creation to
Emperor Severus.
gives an account of how the wall came about and credited its creation to
Emperor Severus.
The initial design started in the east at
Pont Aelius
where
Newcastle upon Tyne now stands, and proceeded west. It was later decided
to extend it 4 miles to the east to
Segedunum
- Wallsend 5 years later in about 127AD,
this was probably done so as to protect the
river crossing at Pont Aelius.
The
new section of wall was built in the narrow width used further west. A section
of wall ran from the fort out into the river, which is tidal to at least the
lowest tidal point.
Well before the wall there was a main Roman
supply road the
'Stanegate', this ran from the River Tyne to the
Solway Firth. The fort at
Roman
Vindolanda (Chesterholm)
stands about mid way
along this vital supply road with the forts and roman
towns at Carlisle to the west and
Corbridge
and
Arbeia
to the
east. Smaller forts and marching camps would have been every
days march, about 13 miles along the road. The wall is positioned just to
the north of this, in some cases sharing bridges between the road and wall,
while at other times the wall following the highest ground is a little way to
the north, but never very far away. The original forts at
Vindolanda
and
Corbridge
both predate the wall.
The stanegate road does not exist as such today, although most of its route
is known. The road that most see is the B6318 that runs near and in places on top
of the wall. This was the military road that was created far later after an Act
of Parliament in 1751 to prevent the recurrence of events that happened in 1745
when Bonnie Prince Charlie took over north west England and the Hanoverian
commander Marshal Wade was stuck at Newcastle as the road to Carlisle
was not up to supporting the artillery. The farmers were far more willing to
sell land for the road over the stony wall area, so for many miles it runs on top
of the road, the wall being saved where it went onto higher ground. The military
road can still be traced going across the B6318 to
Birdoswald
Roman Fort
and the small road that continues from it past the surviving turrets, some on one
side of the road and some on the other. For many years until the road was tarred,
the stone wall could be seen in the base of the military road. Although the
creation of the military road caused very many miles of wall to be destroyed, it
also allows us far easier access to most parts that remain.
Hadrian's Wall was never a frontier in the
modern sense of the end of a territory, the Romans operated well north of the
wall at all times and had many forts and camps north of the wall. It was more a
case of policing and tax gathering.
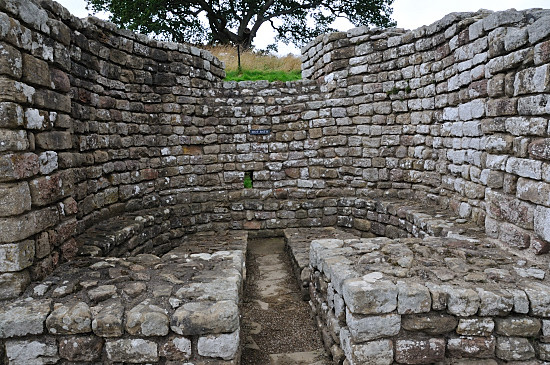
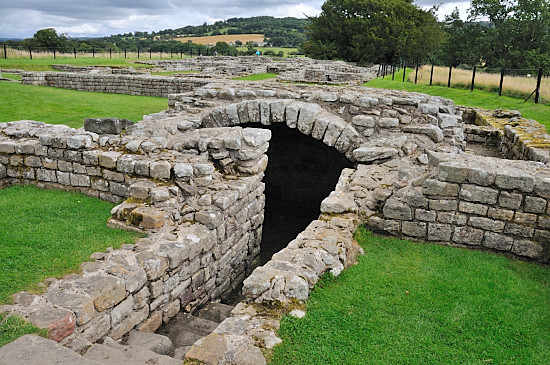
Most of the forts have a very similar look and
layout, most are shaped like playing cards,, rectangular with rounded corners,
most have 4 gateways, while some cavalry forts have 6, 3 either side of the wall.
|
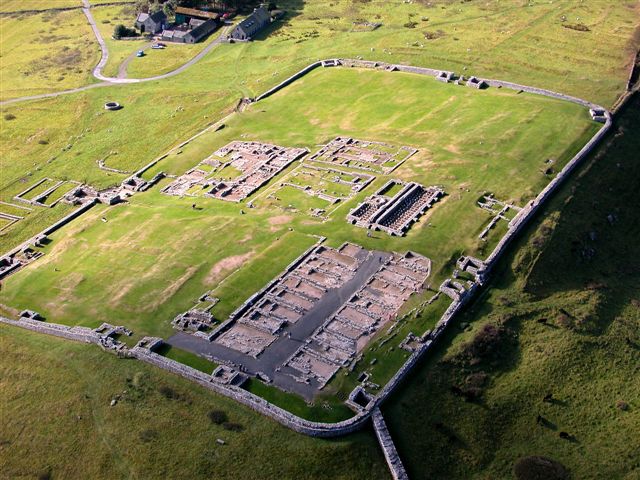
Housesteads
Roman Fort
from the air
Housesteads Roman Fort

This image shows the layout
well. You can see the wall around and the four gateways. We are looking
towards the south east, the wall comes from the bottom right and goes away to
the west in the top right. The most prominent building in the bottom right is
the barrack block, to the left of this more like an outline is a store room,
with a bathhouse more distinct near to the gateway, above the barrack block is
granaries, and less distinct to its left is the Headquarters building. The
larger building to the left again is the commanding officers house. Above the
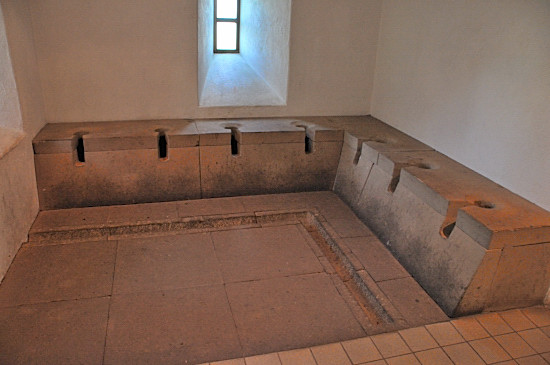
headquarters building is the hospital. At the extreme left, just within the wall,
you can see the latrines, and outside the wall some parts of the civilian
settlement.
Aerial photo by Simon Ledingham
used with permission.
Previously on
www.visitcumbria.com
|
Prior to the reign of Hadrian, the Roman Empire
had been in a constant expansionist phase, they had intended to take the whole
of the island of Britain and was planning a trip on to Ireland. They had fort
lines and had carried out actions through much of Scotland, but it was not as
easy to fit into the Roman world model as the areas further south. Their model
was not to replace existing rulers but to turn them into puppet administrators,
with most of their benefits intact but protected from aggression from others.
Further north into the Scottish Highlands this model did not work as people
were scattered and far more independent, so policing, administering and
tax collecting was more expensive than the revenue produced.
Hadrian decided to consolidate the Empire and
ordered the building of
Roman
Frontiers,
 not
only in Britain but for thousands of miles in Europe and North Africa. not
only in Britain but for thousands of miles in Europe and North Africa.
The line across the country was placed
logically north of its main northern supply road but near enough to it to allow
it to be used to construct the wall and supply forts. The line chosen follows
the highest ground, even when doing so goes up and down extreme sections, and they
could so easily have avoided this. Although a very long military structure
it was designed to be able to be defended from aggressors on either side. If one
mile fort for example came under attack from the south, men could come out of
the northern gates of others and along the north of the wall to provide
reinforcements.
Hadrian's successor in turn decided to move the
line up further and the
Antonine Wall
was built, in this period many of the Hadrian's
Wall forts were not occupied,
although the wall was maintained. Later they abandoned the
Antonine Wall
and went back to Hadrian's
Wall before going back again to
Antonine Wall
and finally back again to Hadrian's Wall.
Having built the wall, over the rest of
the time the Romans were here Hadrian's Wall was breached on at least three
occasions. Twice with damage to the wall when the garrisons were away. It was
therefore necessary to keep large numbers of men in the line of forts. The wall
was substantially damaged a number of times and had to be rebuilt. We know only
of the times the wall was broken and needed to be rebuilt, what we do not know
was how many unsuccessful attacks there were on the wall.
Different sources have slightly different dates
and events, and not much is known of the wall area for periods while the
Antonine Wall
was in use. The location guide on
Corbridge
also
contains quite a lot of history, and I have not duplicated this here.
The main events in the history of the wall are shown below, which is at
least a basic flavour of what was happening at the time.
Over the many years that elapsed, many forts
were rebuilt a number of times,
Vindolanda (Chesterholm)
perhaps 10 times,
Corbridge
5 times
and many of the bridges show remains from at least three bridges on the sites. In
addition to these complete rebuilds there were many smaller alterations, or
changes of use. In addition, our understating of what was happening and the use
of buildings is patchy, often with assumptions and many errors.
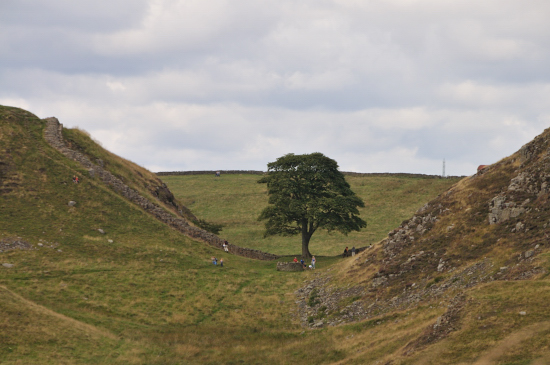
Sycamore Gap
as featured in Robin Hood film
Although much has been destroyed or built on,
over the years, there is also a lot left, and of this some can be visited and
seen exposed, some we can read about from past digs, and there are ongoing
excavations and in some sites will continue to be excavated for over 100 years
to come, while some other sites still have to be investigated. A lot of the
forts are still just humps and bumps in fields.
We can explore this period in the Hadrian's
Wall area by visiting:-
-
Open sites - stone wall remains,
together with the remains of millecastles and turrets.
-
Attractions - excavated remains of forts,
and other special features like temples and baths.
-
Museums showing the items recovered from
excavations.
-
Reconstructed examples of sections of
wall, a fort gatehouse, baths, temples, and more.
Identifying the locations that you may like to
visit can be done by using
Hadrian's Wall - Featured Places,
 or the
Hadrian's Wall Route Guide, or the
Hadrian's Wall Route Guide,  both of
which link to very many individual location guides with photos and links, in many
to picture galleries with more. both of
which link to very many individual location guides with photos and links, in many
to picture galleries with more.

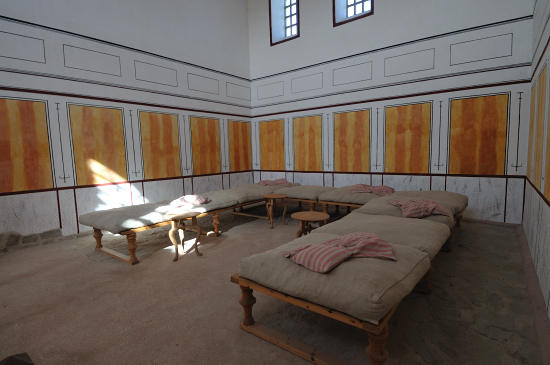
Reconstructed Turret and Wall -
Vindolanda
Roman Vindolanda
|
There
are a number of sites you can visit that show reconstructed features that allow
you to see how the building may have looked like. These include:-
Section
of full size wall:
Turret
Gatehouse for a fort
Barracks
Commanding Officers Residence
Bathhouse
Temple
Shops
Multiple smaller displays
|
Reconstructed fort gatehouse
Arbeia
|
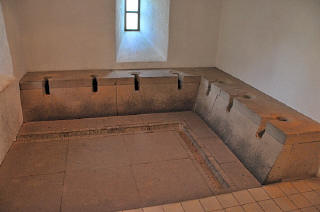
Guess what in the reconstructed
bathhouse
Wallsend |

A room in the reconstructed commanding officers residence at
Arbeia
|
Reconstructed wall with original in front
opposite side of road to
Wallsend
Segedunum Roman Fort
Some of our location guides tell you a great
deal more of what was happening in that particular location,
our guide on
Corbridge
Roman Town
explains the sequence of forts and development of the town, as well as
what you can see today, and the guide on the
Temple of
Mithras gives you a background to the religion involved and its similarities with
other religions.
|
In addition to choosing to visit individual
places on the wall, or using our route guide to drive it, there is also the
Hadrian's Wall Path (National Trail), a long distance path that takes you near to the wall
much of the way from coast to coast. Also a cycling route that covers a
route nearby.
This area also offers many landscape
photography opportunities and
Hadrian's Wall - Featured Places
also identifies some of these.
There are many places along the wall where
photographic opportunities occur, and different people will be attracted to
different scenes. However
Cawfields
Roman Wall and Milecastle 42
and
Steel Rigg
are two
that stand out.
Several of the forts have exceptional views, although
Housesteads
Roman Fort
stands out here. Each of the fort attractions and
Corbridge
Roman Town
have their own features of interest to photographers, and you may wish to
check out each of the galleries to see the sort of photos available at each,
but it may be worth pointing out that in most, between two of us we took
several hundred photos and chose just a small number to give you a flavour
of the sites.
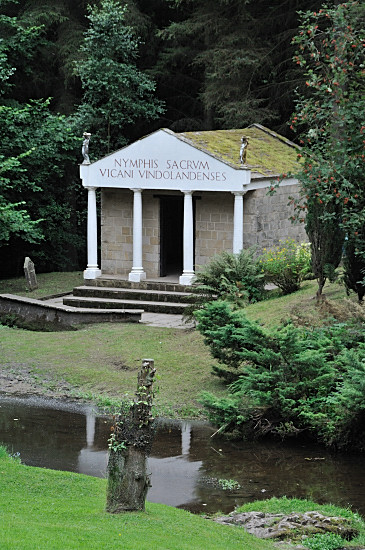
Picture right a reconstructed
temple at
Vindolanda
|
 |
To assist you we have produced a range of
information on Hadrian's Wall.
-
Articles on aspects of the walls and
other roman features.
-
Hadrian's Wall - Featured Places
this identifies the sites you can visit and links to
our location guides.
-
A
large number of location guides looking at individual locations together
with many photographs of what is there. You can identify these from the
featured list, route guide or from the index in our Roman Section.
-
Photo galleries of major places along
the wall, mostly forts and roman towns.
-
A
Hadrian's Wall Route Guide, for those visiting, to assist you with route planning
and finding the locations quickly.
-
Hadrian's
Wall Further
Information
providing other links that may assist you in further research.
-
Roman section index.
Roman
Britain
 Topic index or
Roman
Section
Topic index or
Roman
Section
Over time more information will be added.
|