| Home | Newsletter | Locations | Diary |
|
Indexes |
|
|
|
|
Article Pinhole Adaptor
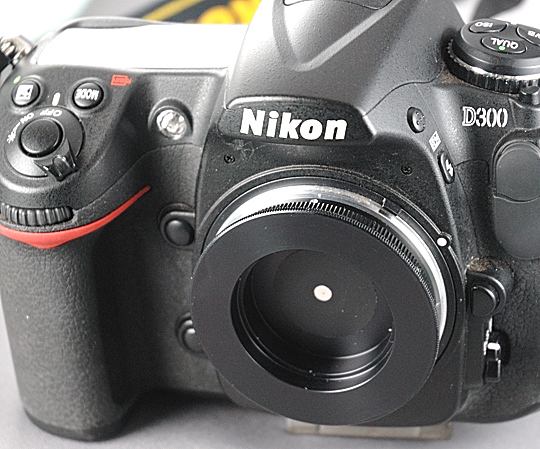
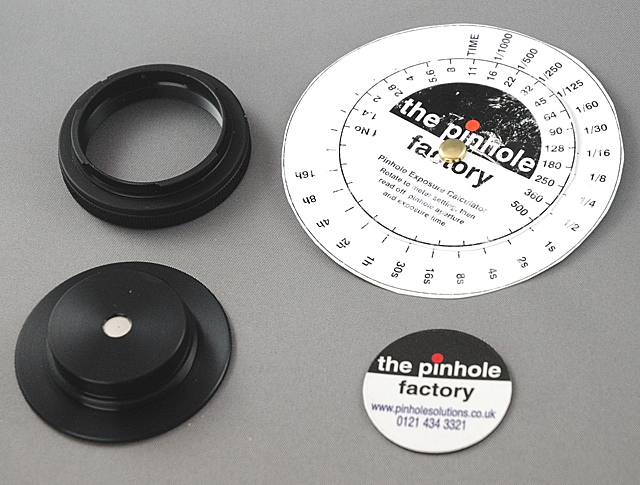
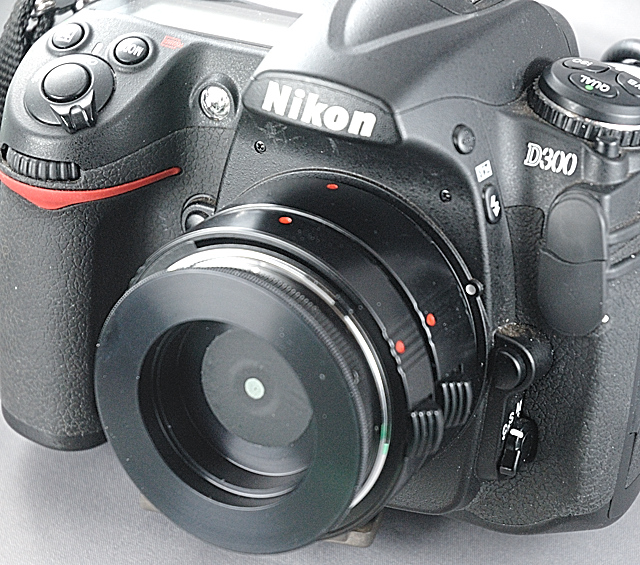
Nikon D300 with Pinhole adapter with T2 mount Introduction Having created my own pinhole devices and decided to search out pinholes, I came across a pinhole adaptor, and decided to get one as it has some advantages in some uses, and is simpler to use than the more elaborate experimental devices I have been constructing. This does not fit directly onto a camera, and is designed to be used with a T2 Mount, available at extra cost. You also get a cover that is made of the material you construct fridge magnets out of, so is lightly magnetic, that is used to protect the pinhole. In practice this is okay, and easy to remove, but comes off very easy so it needs to be kept in a close fitting plastic bag to keep this in place in your camera bag or pocket. It is supplied with an A4 piece of paper giving some suggestions as to use and a piece of card that can be cut up to make an exposure calculator.
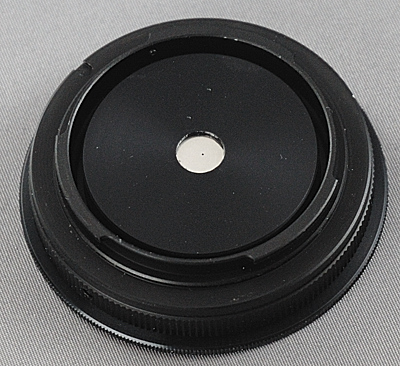
above left T2 mount - bottom right pinhole adaptor The adaptor has a 3mm pinhole that is central. There are no adjustments. The pinhole appears to be the same type as you can purchase separately from the Pinhole Factory, who also supplied this adaptor. Its far easier to use than the type I have made, although not quite as flexible. There is no reason why you cannot put this on tubes to change the focal length, but you cannot change the pinhole size or the position of the pinhole. The cost of the adaptor was £30 and the T2 adaptor, I also got at the same time, cost £10, both post free. As pinholes are £12 each the cost of building a kit myself using 4 pinholes is a little higher, but of course I needed then other materials, equipment and time. The same supplier had another option that would give similar results, you can send them your camera body cap, they add a 0.3mm pinhole lens and return it together with an exposure calculator for £30. This will only work if the camera body cap is made of a material that will not let light in. The Body cap would then not be a complete seal against dust. Most people don't routinely use the body cap, usually leaving a lens on, but would need it if they had to send the camera away for repair, so this is perhaps more or an option if you have several cameras or an old body cap from a previous camera, that will fit. The advantages of the adaptor over making your own are:-
I personally prefer the
Pinhole kit Mk3,
Adaptor description and mounting options This is a piece of metal that is shaped so as to hold a pinhole that is part of it, as far back towards the camera as possible, and fits a T2 mount. T2 Mounts are used by some lens manufacturers, more in the past than today, so that they can have a single lens that will then go onto many makes of camera. Devices like slide copiers are often constructed so they fit a T2 mount. The T2 mount is in two parts, a piece that screws to the lens, or other device, and a piece that connects up with the camera, these two parts are held together by screws allowing the relative position of rotation to be adjusted.
In this case, as the rotational position is not important, we just screw it onto the T2 mount and mount it on the camera. The thread on a M42 adaptor, that is usually used to allow something like a Practika or Pentax lens with standard screw flitting to fit another camera, is similar, and this adaptor will fit into a M42 adaptor but then sticks out of the back. I decided not to risk using this as you may have a collision with the mirror when it flips or other internal parts, altogether there would appear to be plenty of room and some lenses do stick out the back, and some even have filter holders on the back. If I did use the M42 adaptor it would give a wider field of view. I could use the M42 Adaptor if I used a tube element. The M42 adaptor option is therefore a possibility, if you already have one, to save purchasing the T2 Mount.
Focal length and pinhole size The position the pinhole is held with the T2 mount, gives a view that is the equivalent to a 50mm lens on my camera (35mm on a full frame camera). Using my method of card wraps, I cannot get back as far as this and with the smallest tube its around 60mm, I can use a M42 adaptor with a card wrap and get more like 54mm, but this is less ideal. Used directly on the camera with the T2 mount you get about the same view as from a 50mm lens and have an aperture of f167. Ease of Use It is easier to use
because its similar to a normal exchangeable lens and as the image is a
known size and position you can use another lens to set up the shot and work
out the
exposure.
Taking the photo this way, and with a little practice, you can get this right first time most times. Camera settings
Exposure The exposure calculator has one scale
that rotates within a another, you have
shutter speed
We have an
EV Guide
Telephoto options Used with Kenko
tube set,
The table below shows the theoretical focal
lengths with different tubes in use, the aperture with this combination and
a typical
exposure on a sunny day
If you are using a a different size
set of tubes, or some other arrangement then you can get the relevant
figures for your setup to create your own table from the calculator at
www.mrpinhole.com/calcpinh.php
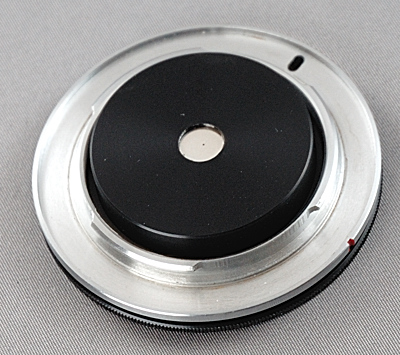
Nikon D300 with 2 smaller tubes and pinhole
adapter, so the equivalent of a 82mm lens.
Pinholes from the
Pinhole
Factory
For web addresses and pricing information see
Pinhole
Cameras
- Further Information
Stanton Drew Stone Circle - Pinhole
Gallery
|
||||||||||||||||||||||||||||||||||||||||||||||||||||||||||||||||||||||||||||||||||
|
||||||||||||||||||||||||||||||||||||||||||||||||||||||||||||||||||||||||||||||||||
| . | ||||||||||||||||||||||||||||||||||||||||||||||||||||||||||||||||||||||||||||||||||
|
||||||||||||||||||||||||||||||||||||||||||||||||||||||||||||||||||||||||||||||||||
|
|
||||||||||||||||||||||||||||||||||||||||||||||||||||||||||||||||||||||||||||||||||