| Home | Newsletter | Locations | Diary |
|
Indexes |
|
|
|
Project Depth of Field MagicEverything you need to undertake this project is available to you from this page without any cost. In this project I am going to
look at how to get depth of field, that many experienced photographers would
think was impossible, using a photographic technique called
Slicing
From this page you can get links to where you can get:-
In addition to this we have the following articles:-
What to do
What we are doing and why You will know that in many macro situations, there is a problem in getting enough depth of field. You want sharp photos, and know that most lenses are sharpest in around the middle of their aperture range, so around F8, but at F8 we don't have anything like enough depth of field, even if we shut it right down to the maximum our lens will go, possibly F22 or F32. Now add to this the additional complication that we want to close up distance using the perspective advantage that a longer lens will give us. We know that we have more depth of field (the amount in focus) when we use a wide angle lens and less when we use a telephoto lens. Using a reduced size sensor, smaller than 35mm helps, such as those on the Nikon DX range of DSLR (digital single lens reflex) cameras.
Problem:- Depth of field as we have this set up Now without altering the camera position, F stop .....
Solution:- with the camera on the same settings and without moving, using slicing we get this.
Looking in detail close up:-
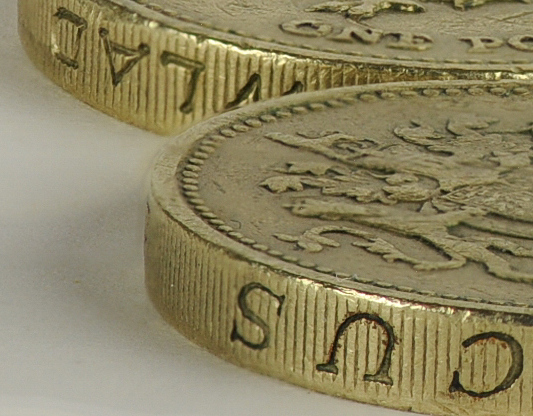
Point nearest the camera full size - section of the above image
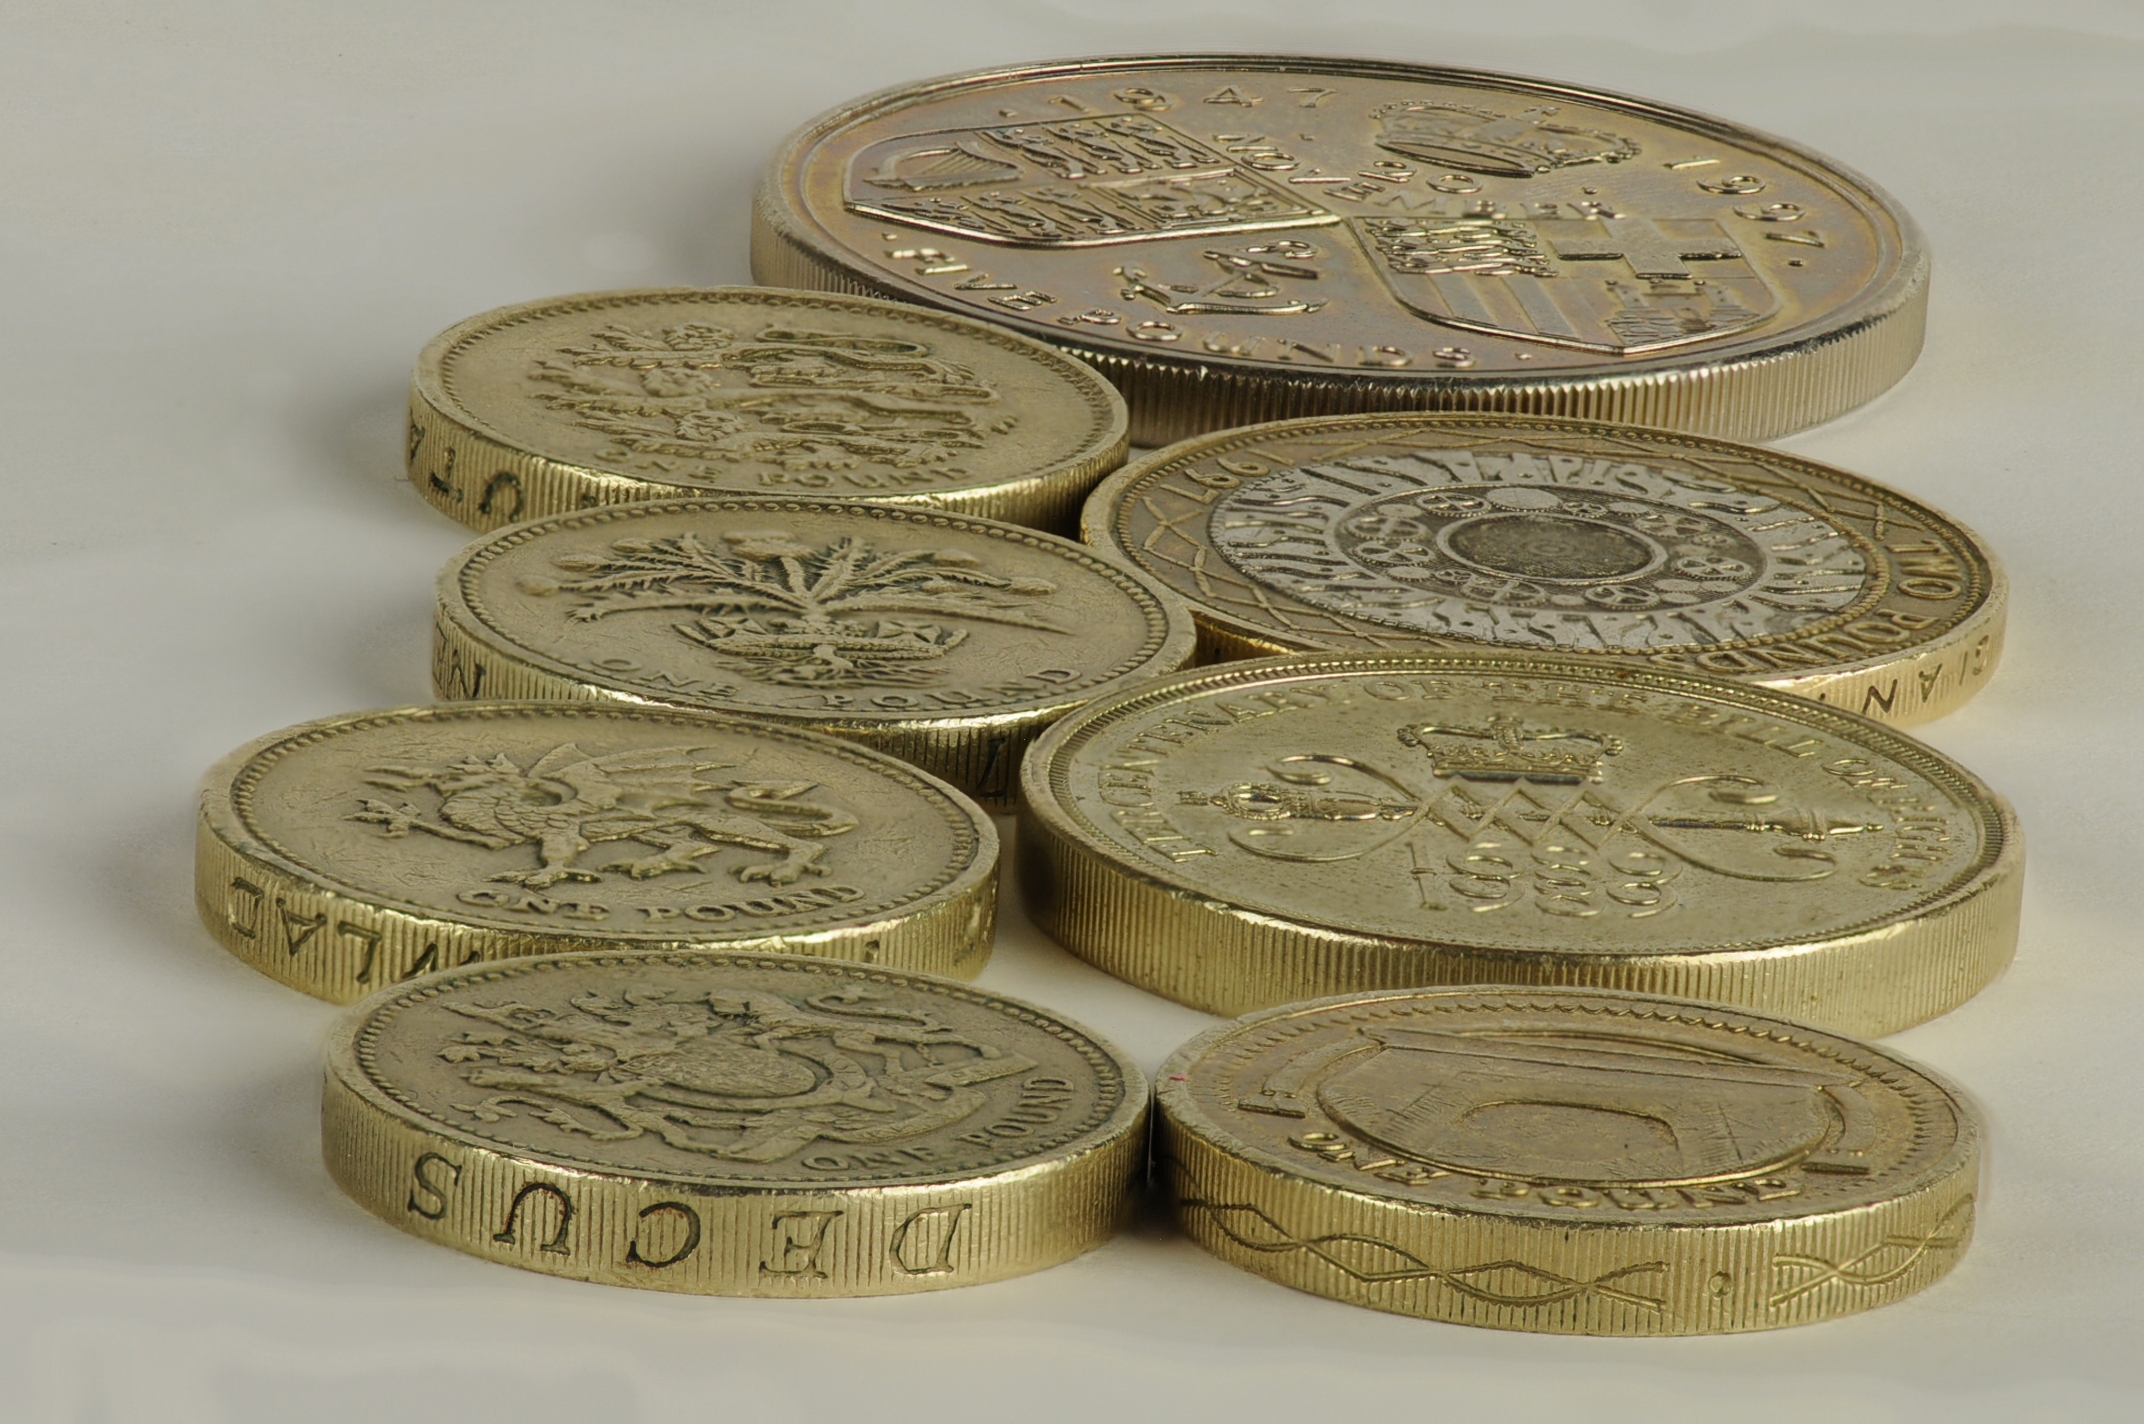
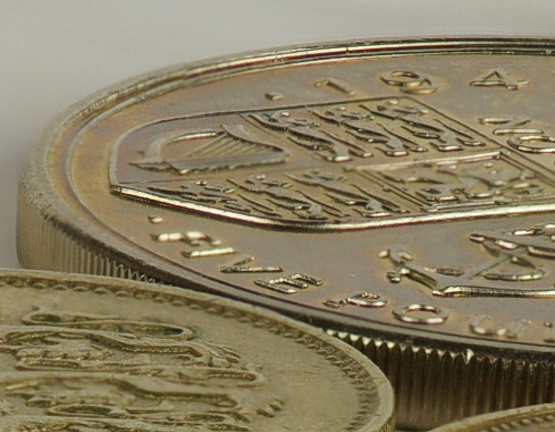
Furthest away from the camera - section from above at full size Compromise is the word that often then comes up, we can't have everything, but of course we can as we will see a little later. Others may look at combing several photos in Photoshop, which is possible if you have the skill and enough days to do it. Here however we want a practical production solution, something that you can use for the one off, but could also use if you were asked to produce a mail order catalogue with a 1,000 small items photographed in macro at an angle. Something that should be a part of every professional photographers skills and that every enthusiast can at least be fully aware of and have tried. The project is to produce a photograph we have labelled 'Impossible Money', it is a selection of coins, in my case living in the UK, I have used UK coins but you could use whatever you have. I have an image that has 5 coins running away from the camera, and 8 coins in total, 5x£1 coins, 2x£2 coins and a £5 coin. I wanted to be able to shoot this so that it filled the frame and also allowed me to see the edges of the coins and compress the distance. I chose to use a 105mm macro lens on a DX camera, this would be just short of 160mm on a full frame or 35mm camera. This lens choice gives a closing up effect but still looks natural. I wanted everything, including chips and scratches on every coin to be fully in focus from the nearest edge to the furthest point.
I took the slices, you can download, with a
DX
format professional camera, the Nikon D300, Nikon 105mm macro lens,
and with the camera connected to a laptop running Nikon Capture Control 2.
The
background was just a sheet of white A2 paper, just curled up at the back,
I underexposed by a third of a stop to make this paper light grey. I lit
it with two
cool-lites
Using Capture Control 2 with the
camera running with Liveview allowed me to see the image before it was
taken on the computer screen and to finely control the focusing, plus to
step the focusing back in small steps, as well as taking the shots without
me needing to touch the camera. I could have used just my magnifying 90
degree viewfinder and focused manually or used Liveview on the back of the
camera and zoomed in on this and fine focused to have achieved the same
results, but its quicker, simpler and more pleasant using the computer
link. See capturing
slices with a Nikon DSLR
As I have taken these images for you, you don't initially need to do this. The first part of the project is to take my images, download link above, and to put these through Helicon Focus, and to just see how this all works and the results that you get. Having installed Helicon Focus you will find it has a demonstration set of slices already in place, by default it loads the last project you were working on. So in future it will start up with your set. However the demonstration set is available from the drop down on the file menu, going to the parameters tag (near top left) and then clicking run, near top right, will build an image from the demonstration set, you can then look at it split screen or single, screen .... to see the results. At the point of writing this the demonstration set is a close up macro shot of the eggs of a moth, on a leaf. You can unload this set by clicking on the small scroll with red cross on it below, in the top of the scrolling box under the run button on the parameters tab. Go to the Files tab (top left), and using the browsing options, top right under run, point to the directory you put the slices in. You can either go down and click each of the boxes or as you have just these images in the directory you can right click and use 'select all'. You can go back to the parameters tab or press the run button from the file tab. You will see the progress being reported at the bottom of the screen, as the image is built. Whichever run button you pressed it will be on the parameters tab now. Very top centre and to the right of this are controls that allow you to select what you can see, either with a single or split pane and the level of magnification. Just clicking on the image magnifies an area just around the mouse point, and holding the mouse button down as you move it allows you to explore the image with magnification. Bottom right under the picture also has a small magnifying glass symbol that opens up more viewing control's. Go to the save tab, and you can save this image. There is a great deal more that you can do with this program, but here we are just looking at this project. You can for example also create animations, 3d images and stitch macro panoramas. The image that you saved, in whatever format you saved it, is now available to view and use in other software. So lets see what we have done. We have used a series of 19 photos that are focused at different points, and have combined the sharpest parts of each to produce a single sharp photograph through the focusing range. The animation below illustrates this, shown at 25% size. The top image is showing the images taken one by one, the display above shows you which one it is and click on any of these to show that shot, stopping the animation. Below this is a static image that is the result, and below this image is a set of controls to control the top image display, it can be stopped, started, slowed down or speeded up. At this point you have seen just how simple, quick and unpainful the process is. I have some more sets of slices that you can use if you like (links end of this page), or you can go on to the other part capturing your own slices. Animation of what is happening The animation available from the link below illustrates this, shown at 25% size. The top image is showing the images taken one by one, the display above shows you which one it is and click on any of these to show that shot, stopping the animation. Below this is a static image that is the result and below this image is a set of controls to control the top image display, it can be stopped, started, slowed down or speeded up. Click here to see the animation in a new window, close the new window to get back here. Creating your own slices Work out something that you would like to do, or start with a few coins yourself, coins are good as a first attempt as they have detail that you can see, so focusing is not that difficult and you can assess how successful you have been. Set up your work area, the camera needs to stay still as does the subject, the lighting needs to be constant, if you have anything reflective, then avoid any moving people or other reflection changes. Run through the sequence of the shots you are thinking of making, so as to see what is going to be in focus at each point, you may only need 3 of 4 shots or may opt for far more. How many shots you take will probably depend on the depth of field you have, (combination of distance, focal length and aperture), and how much control you have over focusing. If you have a Liveview mode, with fine movements of auto focus, and its works well, then you can use this, otherwise use manual focus. While with my system I can take each set first time, with less control and other equipment you may need to take more and sort them out later, producing a set from a larger collection, but avoid this if you can as you will tend to get buried in nearly identical shots and have some missing. However even having put them into the program you can inspect, deselect, add more and so on. With the moth egg demonstration you will find frame 6 has the title and date etc, you can leave this out and the result does not appear to be any different, so often you can leave out or have uneven focus steps and get away with it. So you don't need to be able to have as much control as I have to be able to produce results. When taking your photo sequence, start at the front nearest to you, and work away from you. This has two benefits, firstly there are less halos produced by the program this way, and secondly, the far point is going to be less critical than the near point, so if this ends up slightly out then its does not matter. Number your images in sequence and load them so that the sequence starts the right way around. Process your images. On the parameters tab you can switch the sequence the opposite way around, you have two methods to process the image and some sliders, you can also select or unselect individual images as well as looking at them in this tab. While my images were done on the default settings you may like to try all the combinations. Other tabs contain tools to allow you to retouch the image, add text and scales and to save it in various ways. The button with the question mark hides or shows a help panel. Moving on to more controlled and efficient production of slices Although you can produce slices completely manually, with no special items, you may also like to look at an approach that allows far more control, and faster more efficient production. In
the article capturing
slices with a Nikon DSLR, Project Review As you can see, both by the images I have provided and by running the project yourself, this is a very effective way to gain really impressive depth of field in many situations. Once you have mastered this it will become one of the skills that you have available wherever you are. No longer will you find that in dimly lit places you cannot get images with good depth, in focus, no longer will macro shots of anything that is not flat on be impossible, and it puts you very much in control. As long as you have done this and are aware how it works, then you can capture the images for this any time you need to and come back knowing you will be able to get the results you want. There are occasions when you want to throw something out of focus, but there is lot of 'artistic' work produced that is more a case of lacking the skills to get the image into focus. It has become fashionable to shoot just about any rubbish and pass it away as art, but for documentary use, and to illustrate products, as well as with many other areas, you usually want a sharp image. Next time someone shows you an image that was created 'artistically' largely out of focus, or you see an advertising or magazine shot that has failed, you will know how you could have overcome this. Slicing sets available includes slices, animations showing what they will produce and larger images.
|
||||||
|
||||||
| . | ||||||
|
||||||
|
|