| Home | Newsletter | Locations | Diary |
|
Indexes |
|
|
|
|
Article Filters-ND Graduated Filters
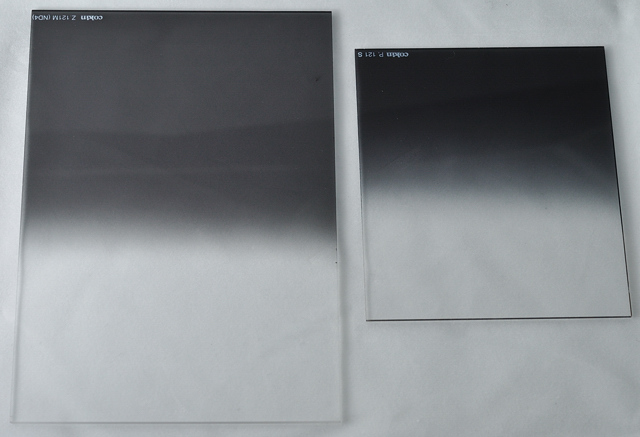
Neutral density graduated filters or 'grads'
allow the exposure to be varied over parts of the image. They are similar to
ND filters,
The most common application is in holding back the exposure of the sky in landscape shots. Often the skies will be too light and be lost in the highlights (over exposed) or if you reduce the exposure the ground will be too dark (underexposed). With a 'grad', with the darkest part at the top, you have in effect put sunglasses on the sky, while the ground is still clear.
An example of when I use 'grads' is for railway photography. A steam train is running along amongst trees, and pushing up white smoke and steam into a bright sky. The contrast between the dark train in the shadows and bright steam/smoke and clouds is too great. We can expose for the train and loose the steam, smoke and clouds, or get that right and the train is very dark. In software we can lighten shadows but in this case its too extreme and we find a lot of noise (random patterns) in the darker areas when editing. By using a 'grad' I can darken the sky, and smoke etc, so that it comes within the exposure range that allows me to get good photos. Grads cannot be used in all situations, for example if you were taking a photography of a windmill that was occupying most of the vertical height of your shot, and the highlight areas were in the sky behind, then using a grad would not only darken the sky but also the windmill and sails. Generally you can use them in scenic situations where you have woodland and the like as these are naturally dark and in most situations where you don't have very large dominant items in the skyline that you do not wish to affect. Even in these situations there may be occasions when you put up with the effect knowing that you can recover or reverse the effect on the foreground item in editing. You will find three types of graduated filters, 'hard', 'soft' and 'hard reversed'
ND grads come in different densities or strengths, from light to dark, they are marked usually with either the ND value and marked graduated or with an ND factor. The conversion between these and the stops of light lost at the darkest part is:-
You can use more than one grad, either in the same direction or at different ones. You could, for example on a beach scene, have a grad up from the bottom darkening the sand near to you, and a second holding back the sky coming down from the top. Many only use 'grads' straight, but you can
run them at any angle that works in your photo. Particularly if you are
using a hard grad, or notice a line ending to form across the subject you
will find that turning it at an angle makes it look both more natural and
the eye tends not to pick up the graduation effect then. If you have more
complex filter holders
In many movies, and in TV dramas you will see an effect used that in affect puts a light steak through the main subjects eyes and often appears to come from a window or light, this can be achieved with two grads 1 up 1 down and the holder rotated. The ideal effect is one that no one can see, but has controlled the exposure in a way that allows all the detail to show. Today of course we can do a lot in editing, but the controlling of extreme contrast is better managed at the point the picture is taken. Photography is also an art, and as such you may want to use the graduated filters to produce some artistic effect. By this I don't mean its a good excuse for things that go wrong, but that you are able to balance up the light in a scene to get the effect that you require. Other parts of this management of the light will include the use of reflectors and fill in flash. What should you get If you don't have any and you are about to splash out then a soft ND4 (ND factor 0.6) 2 stop grad, will be the most useful. You don't necessarily need to have an holder you can just hold it in front of the lens. You will find that as well as buying ND
grads separately, you can get sets, one set has three grads of different
strengths while another has an ND grad and two coloured grads. Some sets have
a basic holder. In addition to this you will need an adaptor. To use it on
more than one lens you may need more adaptors or to use
stepping rings
Start with a few, or even one and get experience before expanding.
Deciding on the value of graduated filter to use Lets look at the ideal solution then at some other ways to achieve this. Ideally you would be able to use your
cameras spot
meter and deduce the filtering effect you require on various parts of the
image to decide which 'grad' to use, or what combination would work best in
this case. The Photography Skills
So if you don't have these skills how do you use grads? Well there are several methods:-
Neither of the simple, or the trial and error approach is working out and dealing with dynamic range but the results will satisfy most people. Even if not fully scientific and you result totally to trial and error you will find that 'grads' can be used to overcome exposure problems. See the article on
filter holders
Concluding ND grads effect the dynamic range, allowing
you to capture higher contrast situations. While you can, in editing get
most types of filter effect, we look at this in
filters- other solutions,
ND grads can be used with
coloured grads, Reading through this page it may look very complex, and have too many variables, but even if you use complete trial and error and allow your camera metering to work out the exposure with the grad in place, you will find you can improve results and its well worth a few experimental sessions to play with this. To start why not just get a single 2 stop neutral grad, no holder and just hold it in front of your lens to see what you can easily achieve. See also:
Filter
Section
|
|||||||||||||||
|
|||||||||||||||
.
|
|||||||||||||||
|
|