| Home | Newsletter | Locations | Diary |
|
Indexes |
|
|
|
|
Article Other Steps We Can Take On White BalanceWhite balance is normally set when taking the photograph, but there are ways to either change it after or to use another way to correct the white balance. In this article we are going to explore these options. Changing it later Providing you have taken the photographs as RAW images (not Jpg's), you can change the white balance setting after. You have the choice of all the white balance settings except PRE, which has to be measured at the time. You can change it in:-
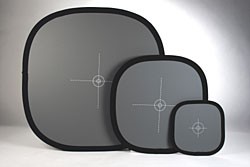
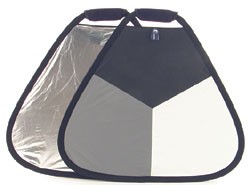
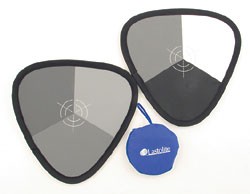
Using a Grey Card, EzyBalance, TriBalance or XpoBalance With these you can take an image with your chosen target included, and the white balance set to a fixed setting for example outside sunny or cloudy, and then continue to take a series of photographs on the same white balance setting.
We are also, for illustrative purposes, using Nikon CaptureNX but you can apply this to many other programs. We are also assuming it was a consistent cloudy day. This is done by:
Although it's better to shoot in RAW this will work in other formats, and faster with smaller files. You could also choose to do other operations at the same time, perhaps increasing colour saturation, warm up, and a little sharpening, as well as resizing..... it's just more steps that are undertaken and included in your selection. This batch process approach is often used by wedding and fashion photographers. If the light changes its important to stop and do an extra shot with the target, then allowing you to work in batches. Personally I prefer to use the
PRE setting method,
Many more options You can also use the white balance system to get specific effects for example warming images, and this can be applied in several ways including false grey targets, that have a similar effect to using filters. White balance is a large topic and we have been able here to show you some of the basics of this here, take a look at our other articles and find out more.
|
||||||
|
||||||
.
|
||||||
|
|