| Macro or micro photography is all about taking
things close up. To different people and companies there is a difference of
opinion as to when something is a macro photo.
We often see macro photography ratios in lens
information, for example 1:1 or 1:3 this means 1 to 1 or 1 to 3 and relates to
the magnification. With 1:1 the image on the sensor or film is the same size as
the real item, while with 1:3 the image on the censor is a third of the size of
the original. This is not affected by the format, a 60mm 1:1 macro lens shows
the image the same size on the sensor or film, its just that a 35mm or FX sensor
covers a wider area than the DX sensor we have in all the current Nikon DSLR’s
except the D3.
The ratio is the largest magnification we can
do with the lens alone, by being little further away or more we can get a larger
converge and therefore a reduced magnification/ratio.
Some lenses will focus quite close, for example
the Nikon 18-200VR, but Nikon don’t call it a macro lens, while a Sigma lens
that focused at the same distance would be labelled as a macro lens. Therefore
you may not need to get an additional lens in order to get quite close, perhaps
1:2 or 1:3.
|
You can click on
any of the pictures
below to see a larger version |
|
Any lens can have close up lenses added, you
can put just a single one or a combination of close up lenses on. Nikon produced
some up to a couple of years ago, two we have can be used singularly or added
together to produce a third strength, and images taken with them are very clear.
We also have a set of close up lenses from another manufacturer and although
they work, the images through them is far softer .
Another route to being able to shoot closer
with any lens in theory is by using tubes, these are basically apparatus that go
between the lens and camera. They have no glass and therefore the make doesn't
affect the image quality. Although in theory they should work with any lens,
they didn’t initially appear to work with at least some DX lenses, you just
could not get an image in focus. We have since worked out that they will work as
long a you don’t put too long/too many tubes on, but how to do this varies from
lens to lens. They now work just fine, producing good images. A bellows is just
an adjustable version of the tube set, and to fit on the camera we have to put
at least one tube on first or the piece of the camera that you hold in your
right hand gets in the way of attaching the bellows unit.
|
|
Most of us who want to do quite a lot of close
up work, rather than adapting an existing zoom or prime lens, will have a macro
lens. We have two the 60mm and 105VR. There are two others also available one
at 85mm with a tilt/shift in, and a 200mm.
With macro, the closer you get the smaller the
area that is in focus (depth of field), and as depth of field is greater with a
wider angled lens, in theory at least we should have a greater depth of field
with the 60mm than any other. However if we want the same sized image, but
don’t want to get so close we could choose a longer one, and for many uses the
105mm is useful. Both of the lenses we have will go 1:1.
We can add close up lens, tubes or bellows to
either of these lenses to get far closer still, allowing us with the tubes to
get close enough to take a portrait of a bee, or with the tube and bellows
together, and an adaptor to reverse the lens, down to looking through the eye
of a needle.
We can light items with conventional light for
normal macro, and a small reflector is often enough to make this better. As we
get closer in we tend to need more light and flash is the best option. You can
use any flash units and reflectors, but using the creative lighting system where
you control one or more flashes with a commander in your camera or added on is
easier and produces better results. Reflectors are of course also widely used,
and makes life far easier. In many cases we can also use a light cube or tent.
Depending on what it is we want to photograph,
different flash arrangements will be best, for example for going out in the
morning to photograph butterflies a free held flash with a diffuser (running
with inbuilt commander or add on) or cable extension to your flash is all that
is needed. On the other hand if you feel you need to go very close and want to
control the light and fill the shadows then a ring on the front of your lens
holding a couple of SB200 units and diffusers would be the answer. The R1 or
R1C1 kit would do this, you can of course also use other flash units or get some
more SB-200’s to sort out lighting the background and more. See
article explaining flash
units
 to see a description of all the options. We have a variety of
flash units including the R1C1 kit, 2 additional SB200’s, 3 SB800’s and 2
SB600’s, you don’t need anything like this amount. to see a description of all the options. We have a variety of
flash units including the R1C1 kit, 2 additional SB200’s, 3 SB800’s and 2
SB600’s, you don’t need anything like this amount.
Other items you will find useful are a tripod,
focusing rack, cable release or remote release, light cubes, backgrounds and
reflectors. We also have some small clamps that allow us to hold some small
items.
|
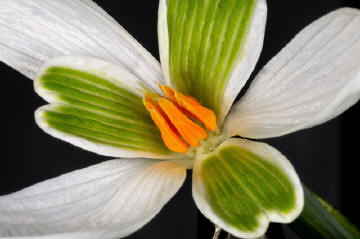
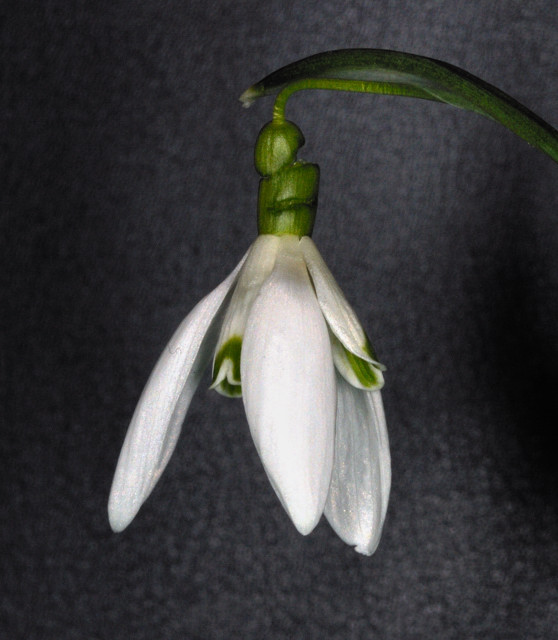
  A Snowdrops hidden beauty A Snowdrops hidden beauty
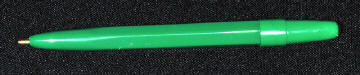
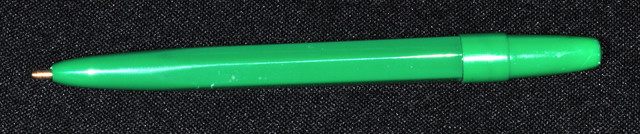
 A small biro, about a third of the
length
of a normal pen.
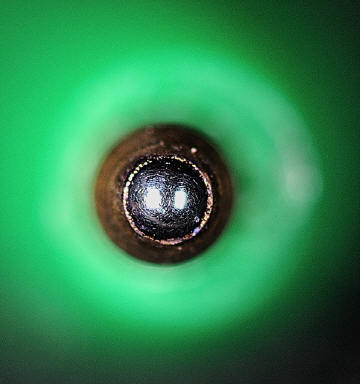
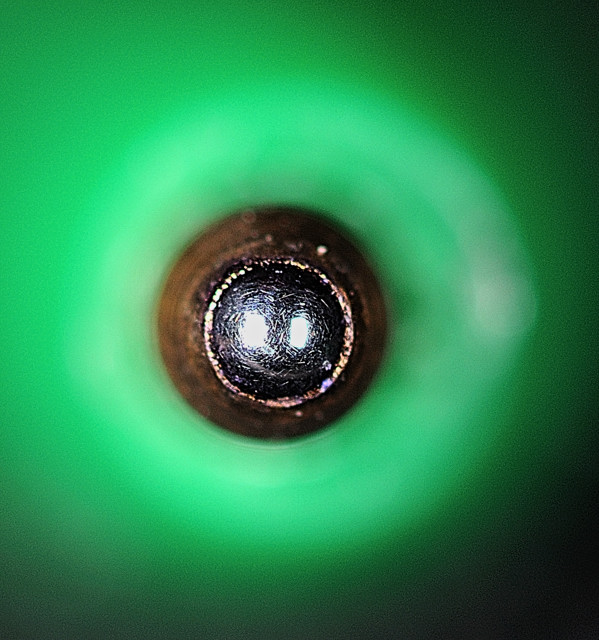
The ball bearing in the above biro tip |
| Our position in the universe, does not allow us
to see unaided very large things, for example planets, and also not to see very
small things that are a part of the everyday world that we live in. Many of the
small items that we do see we don’t see the detail in. For example we all have
seen flies, but have you ever looked at the detail in their wings, did you spot
that bees have 8 eyes, and what about the long eyelashes of a butterfly, what
about the detailed parts of plants. We can see all this with our macro kit and
more. There is of course a whole world well below this that we would need a
microscope to see. Fitting an adaptor to connect your camera to a microscope is
beyond the area we are looking at today. |
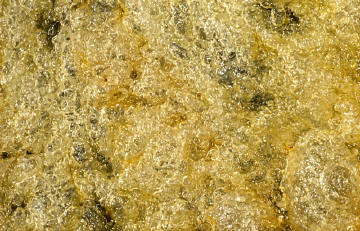
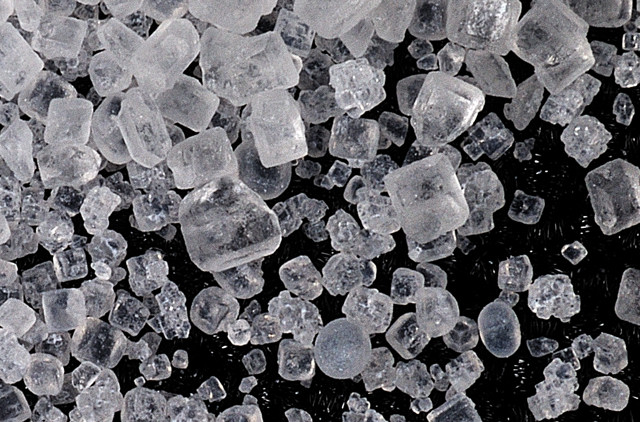
Taking a closer look at a crisp. |